FSA Configurable FNOL Process (Financial Services Accelerator Trail)
Note: Spartacus 4.x is no longer maintained. Please upgrade to the latest version.
Note: Spartacus 4.x was tested with SAP Commerce Cloud versions 1905 to 2205. Spartacus 4.x has not been verified to work with (and is not guaranteed to work with) SAP Commerce Cloud 2211 or later releases.
Note: This trail has been written for and tested on the 4.0 version of the FSA Spartacus libraries.
Financial Services Accelerator offers several trails to help you get more familiar with some of the features. The Customized FNOL Process Trail demonstrates how to create a new user request process in Financial Services Accelerator, using as an example the First Notice of Loss (FNOL) process for Travel Insurance.
Making a custom FNOL process is almost fully available from the Backoffice. The last step, however, in which you enable your Backoffice-configured process to be seen and tested on the storefront, needs to be done in the FSA Spartacus application itself.
The purpose of this document is to provide those final instructions and show how the newly created FNOL process for Travel Insurance can look like on the storefront.
Table of Contents
- Introduction
- Enabling FNOL Process in your Custom Application
- Test your FNOL Process on the Storefront
Introduction
The First Notice of Loss sample process has been implemented in the Financial Services Accelerator on the Auto Insurance product. However, the Financial Services Accelerator enables you to create a tailor-made FNOL process for your insurance products using the User Request Framework.
To create a tailor-made FNOL process for an insurance product:
-
Configure the process in the Backoffice
To do this, follow the instructions given in the FSA Help Portal documentation. The tutorial on the Help Portal uses the Travel Insurance FNOL process as an example.
-
Enable the FNOL process on the SPA side
After you complete all the steps from the tutorial, you need to expose the routes of your newly created FNOL process in your FSA Spartacus application. For instructions on how to do that, see the steps in the next section.
-
Test your FNOL Process on the Storefront
Check if the process you created is visible on the Storefront and test it out.
Enabling FNOL Process in your Custom Application
To complete the creation of your custom FNOL process, which you previously configured in the Backoffice, you need to expose the routes of your customized FNOL page to make it visible on the storefront.
To do that:
- Go to the
app.module.tsfile of your FSA Spartacus application ([your-fsa-spa-root-folder]/src/app). - Enter the following code, having in mind that we used the Travel Insurance example in this tutorial:
const routes: Routes = [
  {
    path: null,
    canActivate: [AuthGuard, CmsPageGuard],
    data: {
      cxRoute: 'travelFnolFirstStepPage',
      pageLabel: 'travelFnolFirstStepPage',
    },
    component: PageLayoutComponent,
  },
];

export const storefrontRoutesConfig: RoutesConfig = {
  travelFnolFirstStepPage: { paths: ['travelFnolFirstStepPage'] },
};

export const routingConfig: RoutingConfig = {
  routing: {
    routes: storefrontRoutesConfig,
  },
};

@NgModule({
  imports: [
    ...
    RouterModule.forChild(routes),
    ConfigModule.withConfig(routingConfig),
  ],
Test your FNOL Process on the Storefront
In order to test your FNOL process, perform the following steps:
- On the storefront, create a travel policy and check if it is available in the My Policies section of the My Account area (screenshot).
- Log into the Backoffice, then navigate to Financial Services > Insurance > Policies node.
- Find the travel policy you created and then click on it to open the context menu.
- Change the start date and the effective date of the policy to be in the past. This is necessary for the FNOL process to be visible on the storefront immediately.
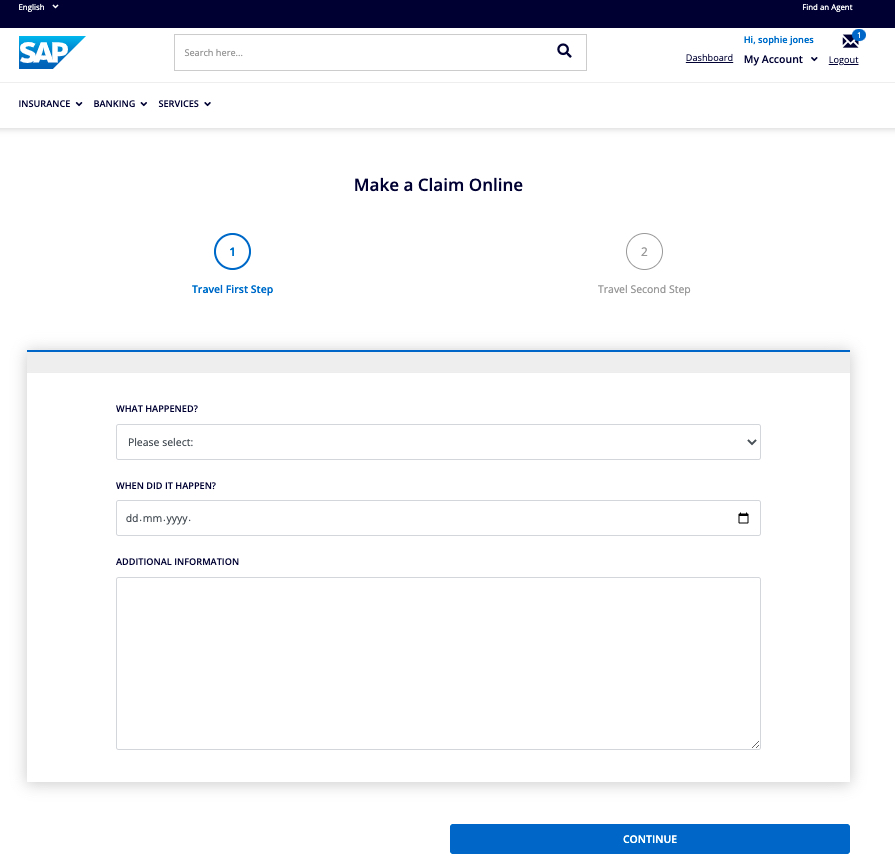
- Go back to the storefront and navigate to the Policies page in the My Account area. You should see the Make a Claim button on the travel policy.
- Click on the Make a Claim button to start the FNOL process.
-
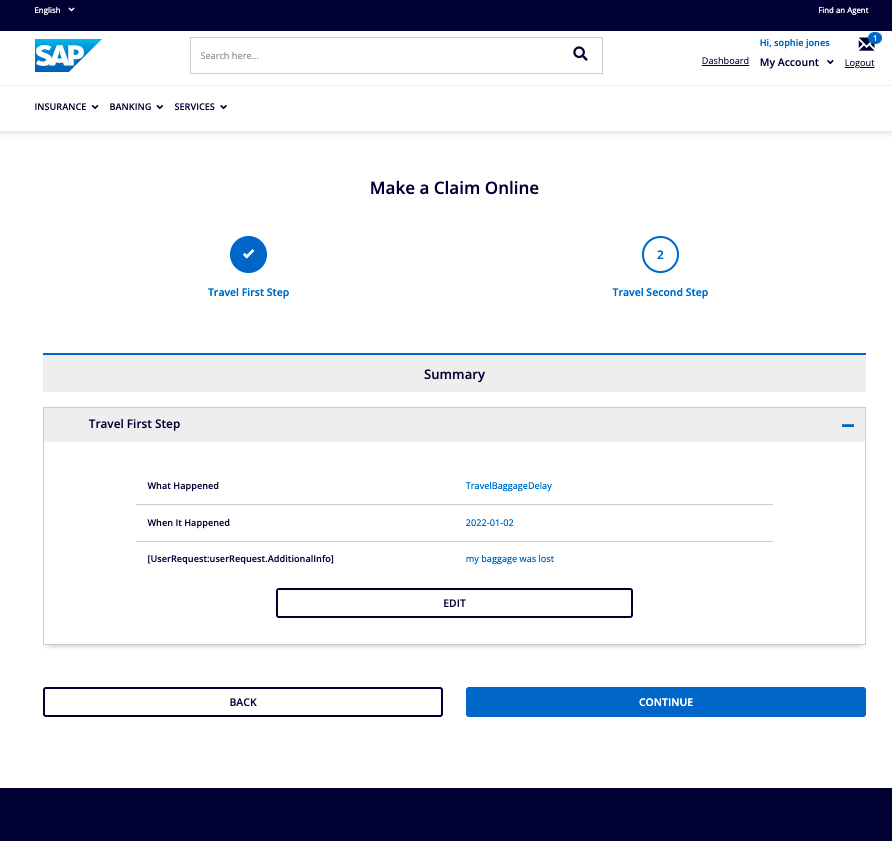
Check if all the forms and steps are as you configured them in the Backoffice.
-
Fill out the forms and submit the claim.
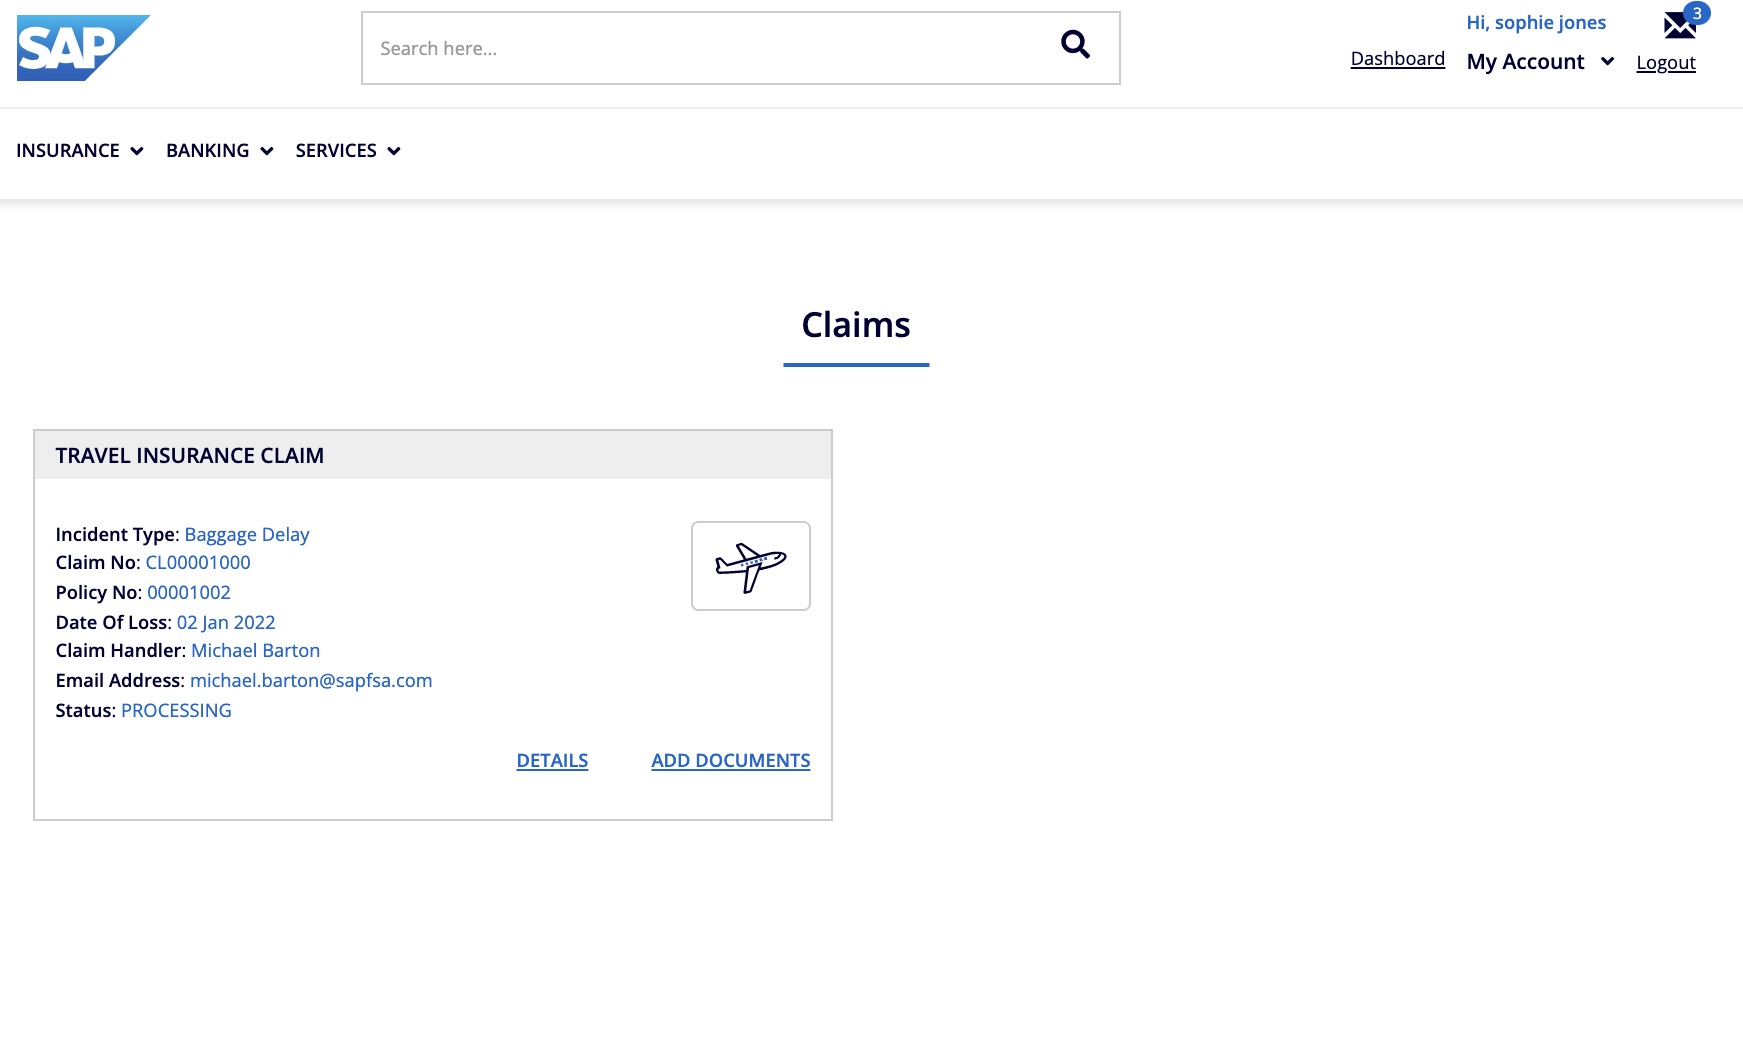
Congratulations! You successfully created a custom FNOL process for your insurance website.