FSA Agent Enablement
Note: Spartacus 4.x is no longer maintained. Please upgrade to the latest version.
Note: Spartacus 4.x was tested with SAP Commerce Cloud versions 1905 to 2205. Spartacus 4.x has not been verified to work with (and is not guaranteed to work with) SAP Commerce Cloud 2211 or later releases.
Note: This feature is introduced with version 4.0 of the FSA Spartacus libraries.
Financial Services Accelerator provides a framework that enables business users to execute processes on behalf of their customers. For this purpose, we have introduced the On-Behalf-of Framework (OBO framework).
Table of Contents
Overview
The On-Behalf-of Framework is based on the on-behalf-of consent (OBOConsent), and a new user group named Seller Group (sellergroup).
To make use of this feature, business users first need to be added to the Seller Group. Every member of this user group is defined as a Seller and can create new customers and perform actions on their behalf in the portal. Adding users to Seller Group is done through the Backoffice.
When sellers create customers, they are automatically given the OBOConsent with full permissions to execute business actions in name of the created customer.
Currently, the seller can prepare quotes for a customer and get a preview of their activities and insured objects (quotes, policies, claims).
For more information on back-end implementation, see Agent Enablement documentation on the SAP Help Portal.
The central place of the OBO framework on the FSA Spartacus is the Seller Dashboard page, introduced for this occasion.
User Journey
Accessing the Seller Dashboard
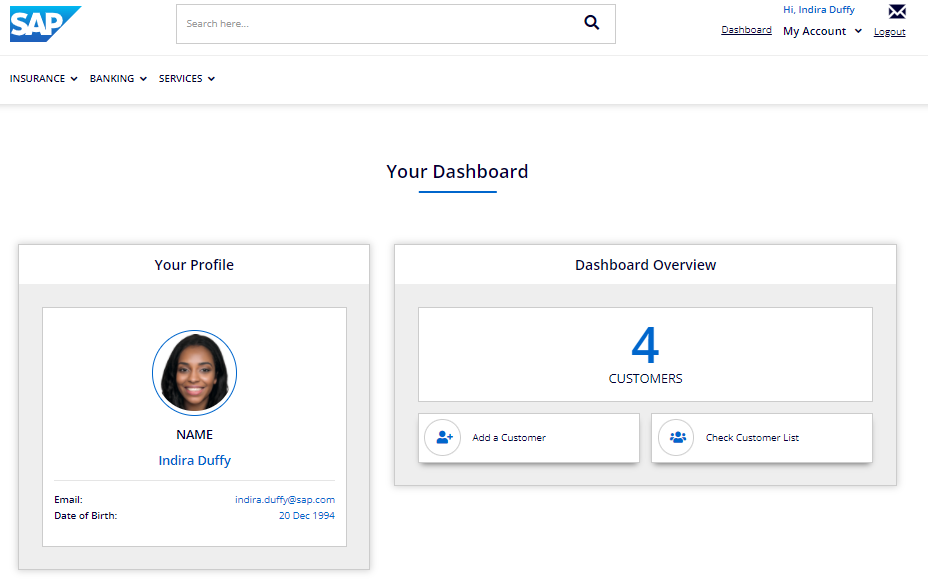
After logging in, the business user with the seller role can access the Seller Dashboard by clicking the Dashboard link in the upper right corner, next to My Account.

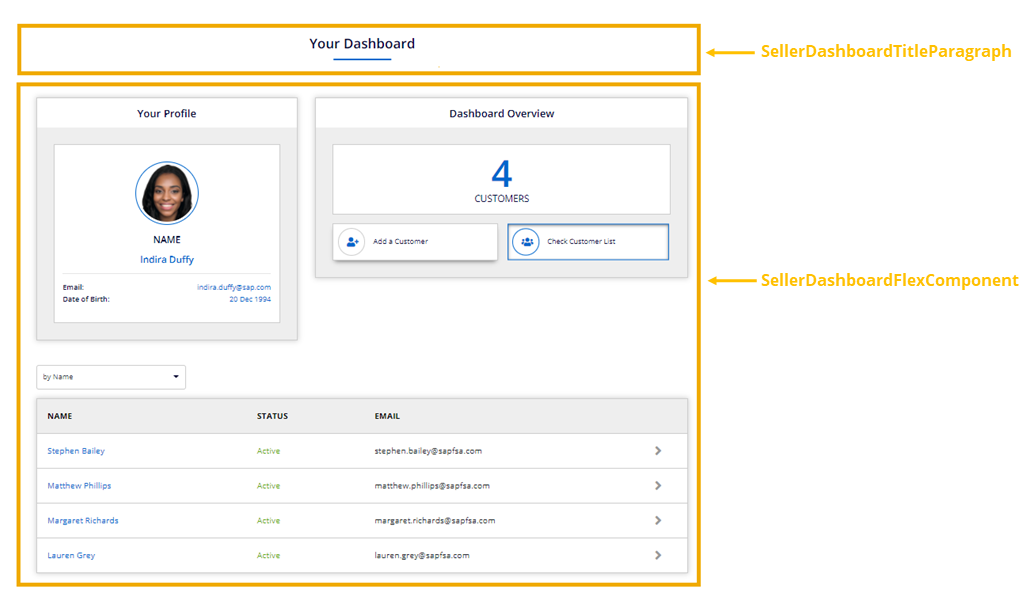
After they land on the Dashboard, sellers can see their personal details on the right, while in the Dashboard Overview section on the left, they can see number of existing customers, as well as options for adding a new customer and previewing the list of existing customers.
Creating Customer Account
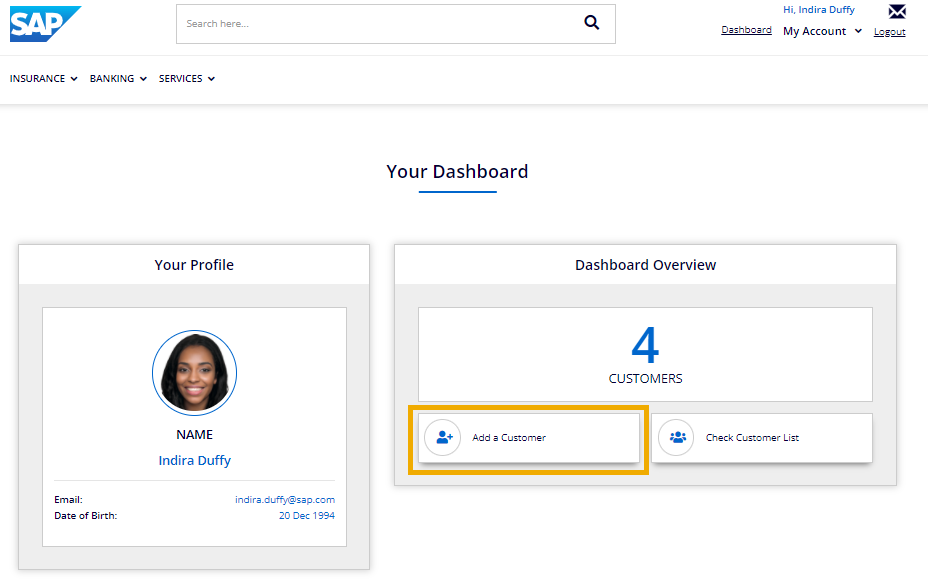
To create a new customer account, seller clicks the Add a Customer card in the Dashboard Overview section.
After that, the seller fills in the form with customer data, such as customer name, e-mail address and date of birth.
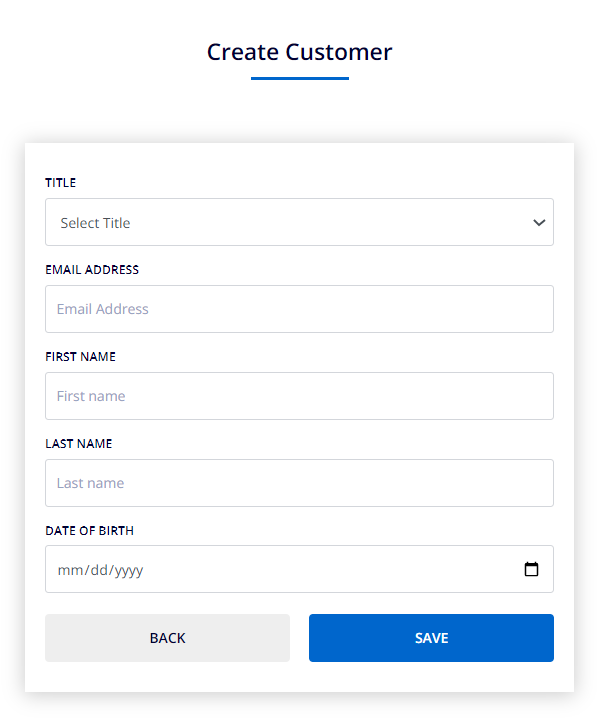
After saving the changes, seller can see the newly created customer in their list of customers on the Dashboard.
Performing Actions On-Behalf-of the Customer
In the default implementation, besides creating an account for the customer, the seller can create quotes and applications. The seller starts the quotation and application process, filling in the forms with data previously obtained from the customer. On the Quote Review step, the seller is prompted to select the customer for whom they wish to create the quote/application. The seller selects the customer by clicking the Select link next to the customer’s name.
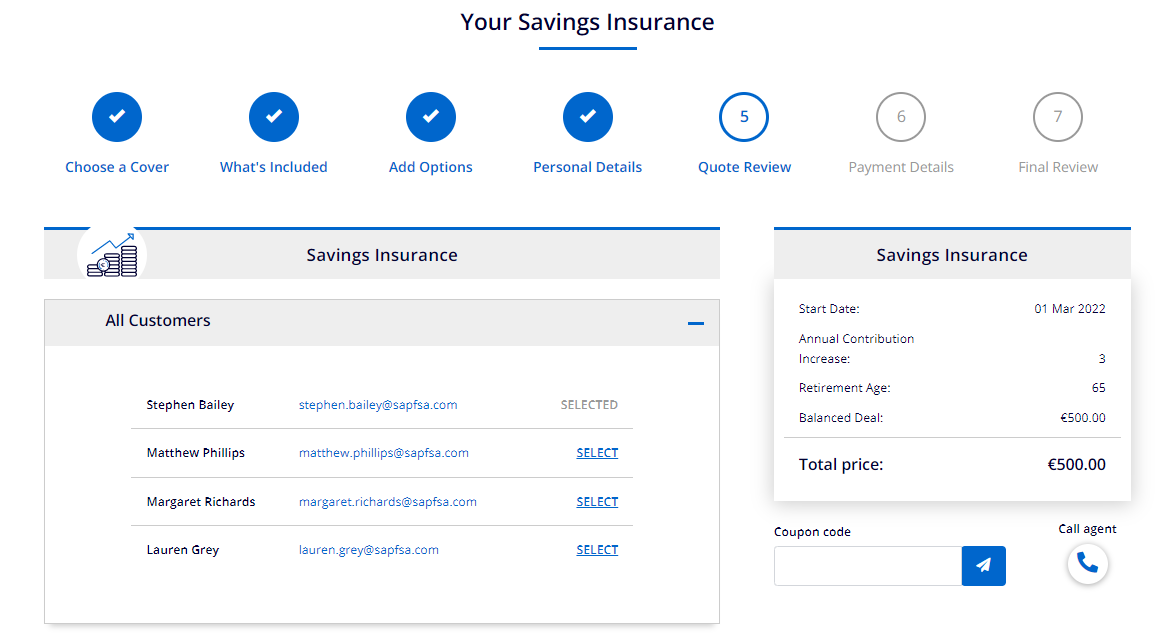
The seller can select only one customer at the time. Clicking again on the Select link next to another customer’s name will deselect the previously selected customer. After selecting the customer, the seller confirms the quote, which then becomes bound. The system informs the seller that the quote has been successfully created with a toast message and returns them to the homepage.

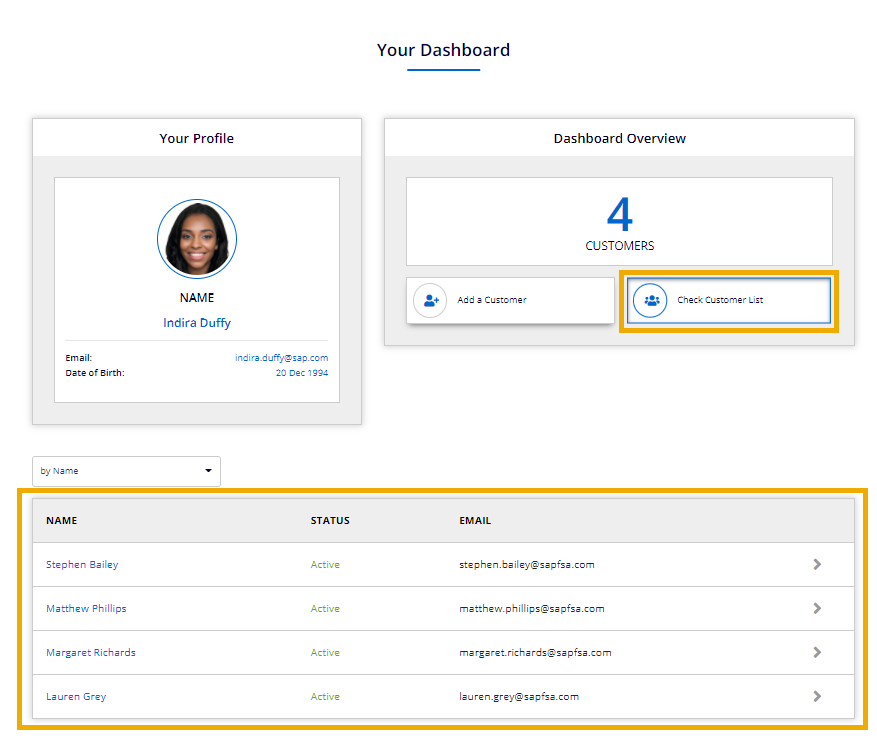
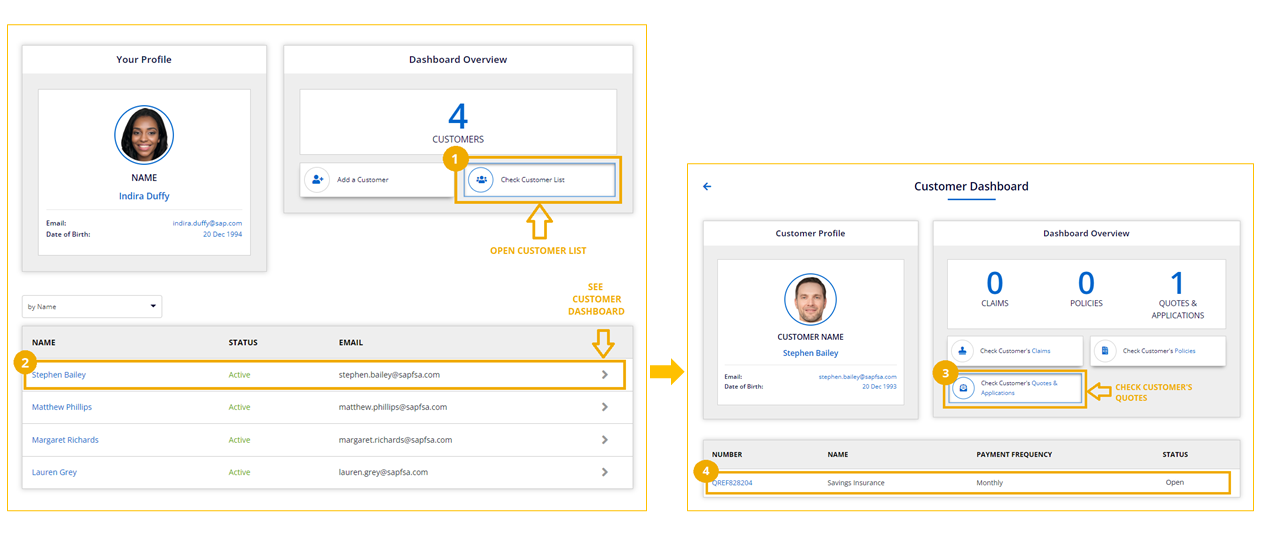
The seller can create as many quotes or applications for the customer as found necessary. After creating the quote, the seller can check if the quote they just created appears on the Customer Dashboard. To do that, the seller navigates to Dashboard, opens the list of customers (Step 1 in the figure below) and selects the customer on whose behalf they just created the quote (2). Click on the arrow opens the Customer Dashboard, where the seller chooses to check customer’s quotes and applications (3). The newly created quote appears in the list (4).
The customer on whose behalf the seller was acting can then log in to their account and access the created quotes on the Quotes and Applications page of the My Account area. The customer retrieves the quote or application, enters payment details and completes the checkout.
Components
Seller Dashboard
Seller Dashboard is a content page with ID seller-dashboard, which consists of two content slots.
The first content slot contains SellerDashboardTitleParagraph which is responsible for rendering the title of the page.
The second content slot contains SellerDashboardFlexComponent, which maps to the FSA Spartacus SellerDashboardComponent, responsible for rendering the seller dashboard details.
SellerDashboardComponent displays seller’s photo and personal details (name, e-mail, date of birth), as well as the paginated list of seller’s customers.
SellerDashboardComponent, SellerDashboardListComponent and CreateOBOCustomerComponent are declared and exported in main SellerDashboardModule.
Page route: /seller-dashboard.
Page route for Create Customer page: /seller-dashboard/create-customer.
The Seller Dashboard page is protected with guards provided by Spartacus, like AuthGuard and CmsPageGuard, and with a custom SellerDashboardGuard.
SellerDashboardGuard will allow access to the page only if the currently logged-in customer is part of the Seller user group.
If not, the appropriate message is displayed, informing the user that they do not have sufficient permissions.
Customer Dashboard
The Customer Dashboard page is used to display details about customers created by the seller. Customer dashboard relies heavily on the My Dashboard feature. For more information, see My Dashboard.
Page route: /user-profile/:customerId.
Customer Dashboard page is guarded by AuthGuard and CmsPageGuard.