Deploy Application to Cloud Foundry with the SAP Cloud SDK for JavaScript
Overview
In this part of the tutorial, you will do the following:
- Deploy your application to Cloud Foundry in SAP Business Technology Platform
- Configure a destination in the SAP Business Technology cockpit
- Consume the destination in your application
Deploy Application to Cloud Foundry
To deploy your application, you need to add a manifest.yml file to the root directory.
It is a deployment descriptor file for Cloud Foundry environment in SAP BTP.
The file should look like this:
applications:
  - name: <YOUR-APPLICATION-NAME>
    path: .
    buildpacks:
      - nodejs_buildpack
    memory: 256M
    command: npm run start:prod
    random-route: true
where <YOUR-APPLICATION-NAME> is replaced by the name you specified when initializing the project.
- The specified
pathinstructs Cloud Foundry to upload all the files from thedist/folder. - The command specified under the
commandattribute tells the buildpack what command to issue to start the application.
Next, you need to login to Cloud Foundry in SAP Business Technology Platform using the cf CLI. First, you need to set an API endpoint. The exact URL of this API endpoint depends on the region your subaccount is in. Open the SAP Business Technology Platform Cockpit and navigate to the subaccount you are planning to deploy your application to. Click on Overview on the left and you can see the URL of the API endpoint.
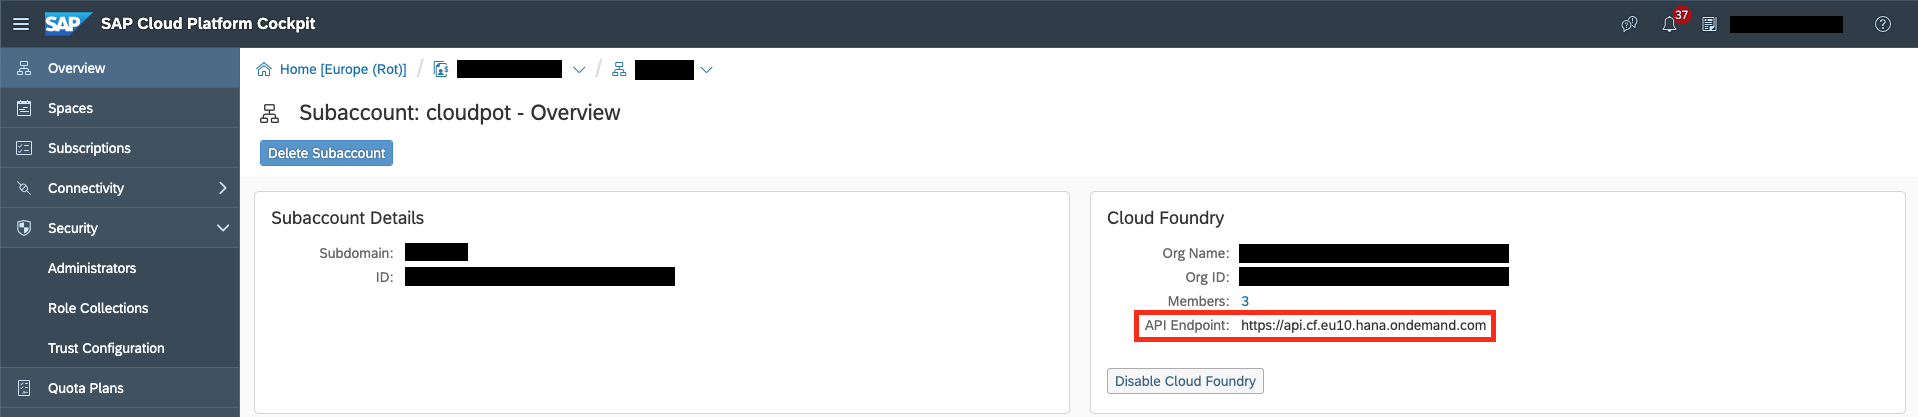
Copy the URL and paste it into the following command in your command line:
cf api https://api.cf.<region>.hana.ondemand.com
cf login
The cf login command will prompt you for your username and your password.
Should you have more than one organization or space, you will also have to select those.
Finally, if you have logged in successfully, it is time to build and deploy your application.
The package.json contains a few scripts that can be used for this purpose.
In productive environments you would transpile the application from TypeScript to JavaScript using the build script and deploy the application using:
cf push
Dependencies will be installed automatically when deploying to Cloud Foundry.
The Cloud Foundry CLI will automatically pick up the manifest.yml of the project when deploying your application.
When everything works as expected, you should get an output that looks something like this:
Waiting for app to start...

name:              <YOUR-APPLICATION-NAME>
requested state:   started
routes:            <YOUR-APPLICATION-NAME>.cfapps.eu10.hana.ondemand.com
last uploaded:     Thu 21 Mar 14:05:32 CET 2019
stack:             cflinuxfs3
buildpacks:        nodejs

type:            web
instances:       1/1
memory usage:    256M
start command:   node index.js
     state     since                  cpu    memory        disk           details
#0   running   2019-03-21T13:05:47Z   0.0%   16M of 256M   126.8M of 1G
The application will be running at the routes URL.
You can also make sure that the application works correctly by running the start command, this command can be different from the one shown above.
Should the application not work for whatever reason, you can call the following command to access the logs:
cf logs <YOUR-APPLICATION-NAME> --recent
Deploy the Business Partner Mock Server (Optional)
If you have access to an SAP S/4HANA Cloud system, you can skip this step.
If you have used the OData Mock Service for the business partner API in the previous tutorial, you will now also have to deploy it to Cloud Foundry.
Navigate to the mock server project's root folder, which already contains a manifest.yml, and run:
cf push
Make sure that your mock server and Node.js are up to date. When the server has been pushed successfully, cf CLI will output the route where the server can be reached. Copy this route, as you will need it in the next step.
Configure Destination
Now that you have deployed your application, you need to configure a destination in the Cloud Cockpit so that it can be used by your application.
Start by opening the Cloud Cockpit in your browser and logging in.
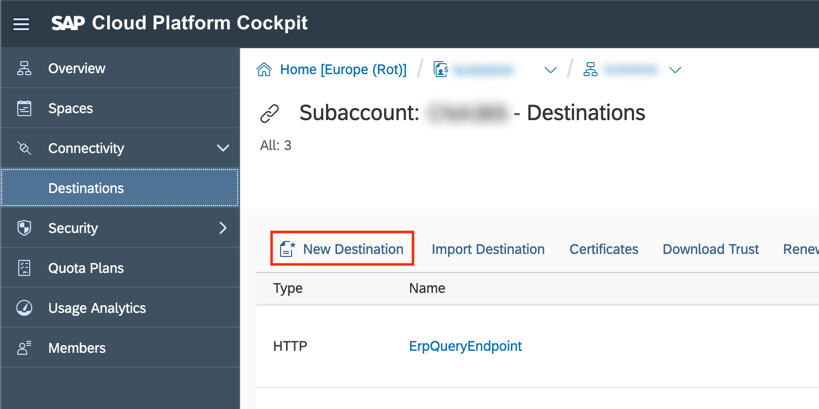
Next, navigate to your respective subaccount (in case of a trial account it should be called trial). In the menu bar on the left, there should be a section Connectivity with an entry called Destinations. Click Destinations. On the page that opens, click New Destination and fill in the details below.
For Name, choose a name that describes your system.
This tutorial will go with MockServer.
If you use the business partner mock server, for URL enter the URL that you have saved from the previous step and use NoAuthentication for Authentication.
If you use an SAP S/4HANA Cloud system, enter the system URL in the URL field and choose BasicAuthentication as the authentication type.
This will make the fields User and Password appear.
Enter here the credentials of a technical user for your SAP S/4HANA Cloud system.
Bind Destination Service
To allow the application to use the destination you have just configured, you need to bind instances of the destination and the XSUAA services to your application.
To create an instance of the destination service, execute the following command:
cf create-service destination lite my-destination
This tells Cloud Foundry to create an instance of the destination service with service plan lite and make it accessible under the name my-destination.
You can now use the name to bind this service to your application.
To do this, open your manifest.yml and add a section called services, under which you can then add the name of the created service.
The resulting manifest.yml should look like this:
applications:
  - name: <YOUR-APPLICATION-NAME>
    path: .
    buildpacks:
      - nodejs_buildpack
    memory: 256M
    command: npm run start:prod
    random-route: true
    services:
      - my-destination
Secondly, you need an instance of the XSUAA service.
The XSUAA service is responsible for issuing access tokens that are necessary to talk to other services, like the destination service.
For this service, you will need a bit of extra configuration in the form of a configuration file.
Create a file called xs-security.json with the following content:
{
  "xsappname": "<YOUR-APPLICATION-NAME>",
  "tenant-mode": "shared"
}
The value for xsappname again has to be unique across the whole of Cloud Foundry in SAP Business Technology Platform.
Make sure to choose a unique name or prefix.
Now, execute the following command:
cf create-service xsuaa application my-xsuaa -c xs-security.json
As before, add the newly created services to the services section of your manifest.yml.
services:
      - my-destination
      - my-xsuaa
Finally, you need to adapt the getAllBusinessPartners() function in business-partner.service.ts to use the destination defined in the SAP BTP Cockpit.
The function now looks like this:
async getAllBusinessPartners(): Promise<BusinessPartner[]> {
  const { businessPartnerApi } = businessPartnerService();
  return await businessPartnerApi.requestBuilder().getAll().execute({
    destinationName: 'MockServer'
  });
}
In the snippet, the parameter of the execute() method is replaced with an object whose key destinationName refers to the name of the destination you defined earlier.
If you followed this step in the previous tutorial, your code will already refer to the correct destinationName.
If you chose a different name than MockServer, make sure to use it here accordingly.
Now you can recompile and redeploy the application.
When you now call the /business-partner route of your app, the Business Partners will be retrieved from the defined destination.
Final Code Review
In this tutorial, you deployed your application to Cloud Foundry. You configured a new destination in the Cloud Cockpit. You created instances of destination and XSUAA services to consume the configured destination.
Here are the code files discussed on this page:
- manifest.yml
- xs-security.json
applications:
  - name: <YOUR-APPLICATION-NAME>
    path: .
    buildpacks:
      - nodejs_buildpack
    memory: 256M
    command: npm run start:prod
    random-route: true
    services:
      - my-destination
      - my-xsuaa
{
  "xsappname": "<YOUR-APPLICATION-NAME>",
  "tenant-mode": "shared"
}