🚂 Build, Release & Publish
When developing Crossplane Providers, we propose a single process across all projects to ensure high quality and reliability.
This guide walks you through the steps to build, release, and publish your changes effectively.
Code
Build
We begin by bringing our code changes into a shippable state by following our Definition of Done.
We encourage all contributors to follow and share these practices.
Definition of Done
Any resource or feature we ship should fulfill the following criteria, reflected in its versioning. Requirements for each version build on top of each other.
| Category | Testing | Documentation |
|---|---|---|
| v1alpha1 |
|
|
| v1beta1 |
|
|
| v1 | [For future] Provider resource (CPU/Memory) consumption checks (benchmark environment) |
Build release candidate
Once your code changes are ready to be shipped, the next step is to create a release candidate.
Provider releases are performed by Maintainers.
To create a release candidate, please follow the steps below.
- Open the GitHub repository of the project you want to create a release candidate for
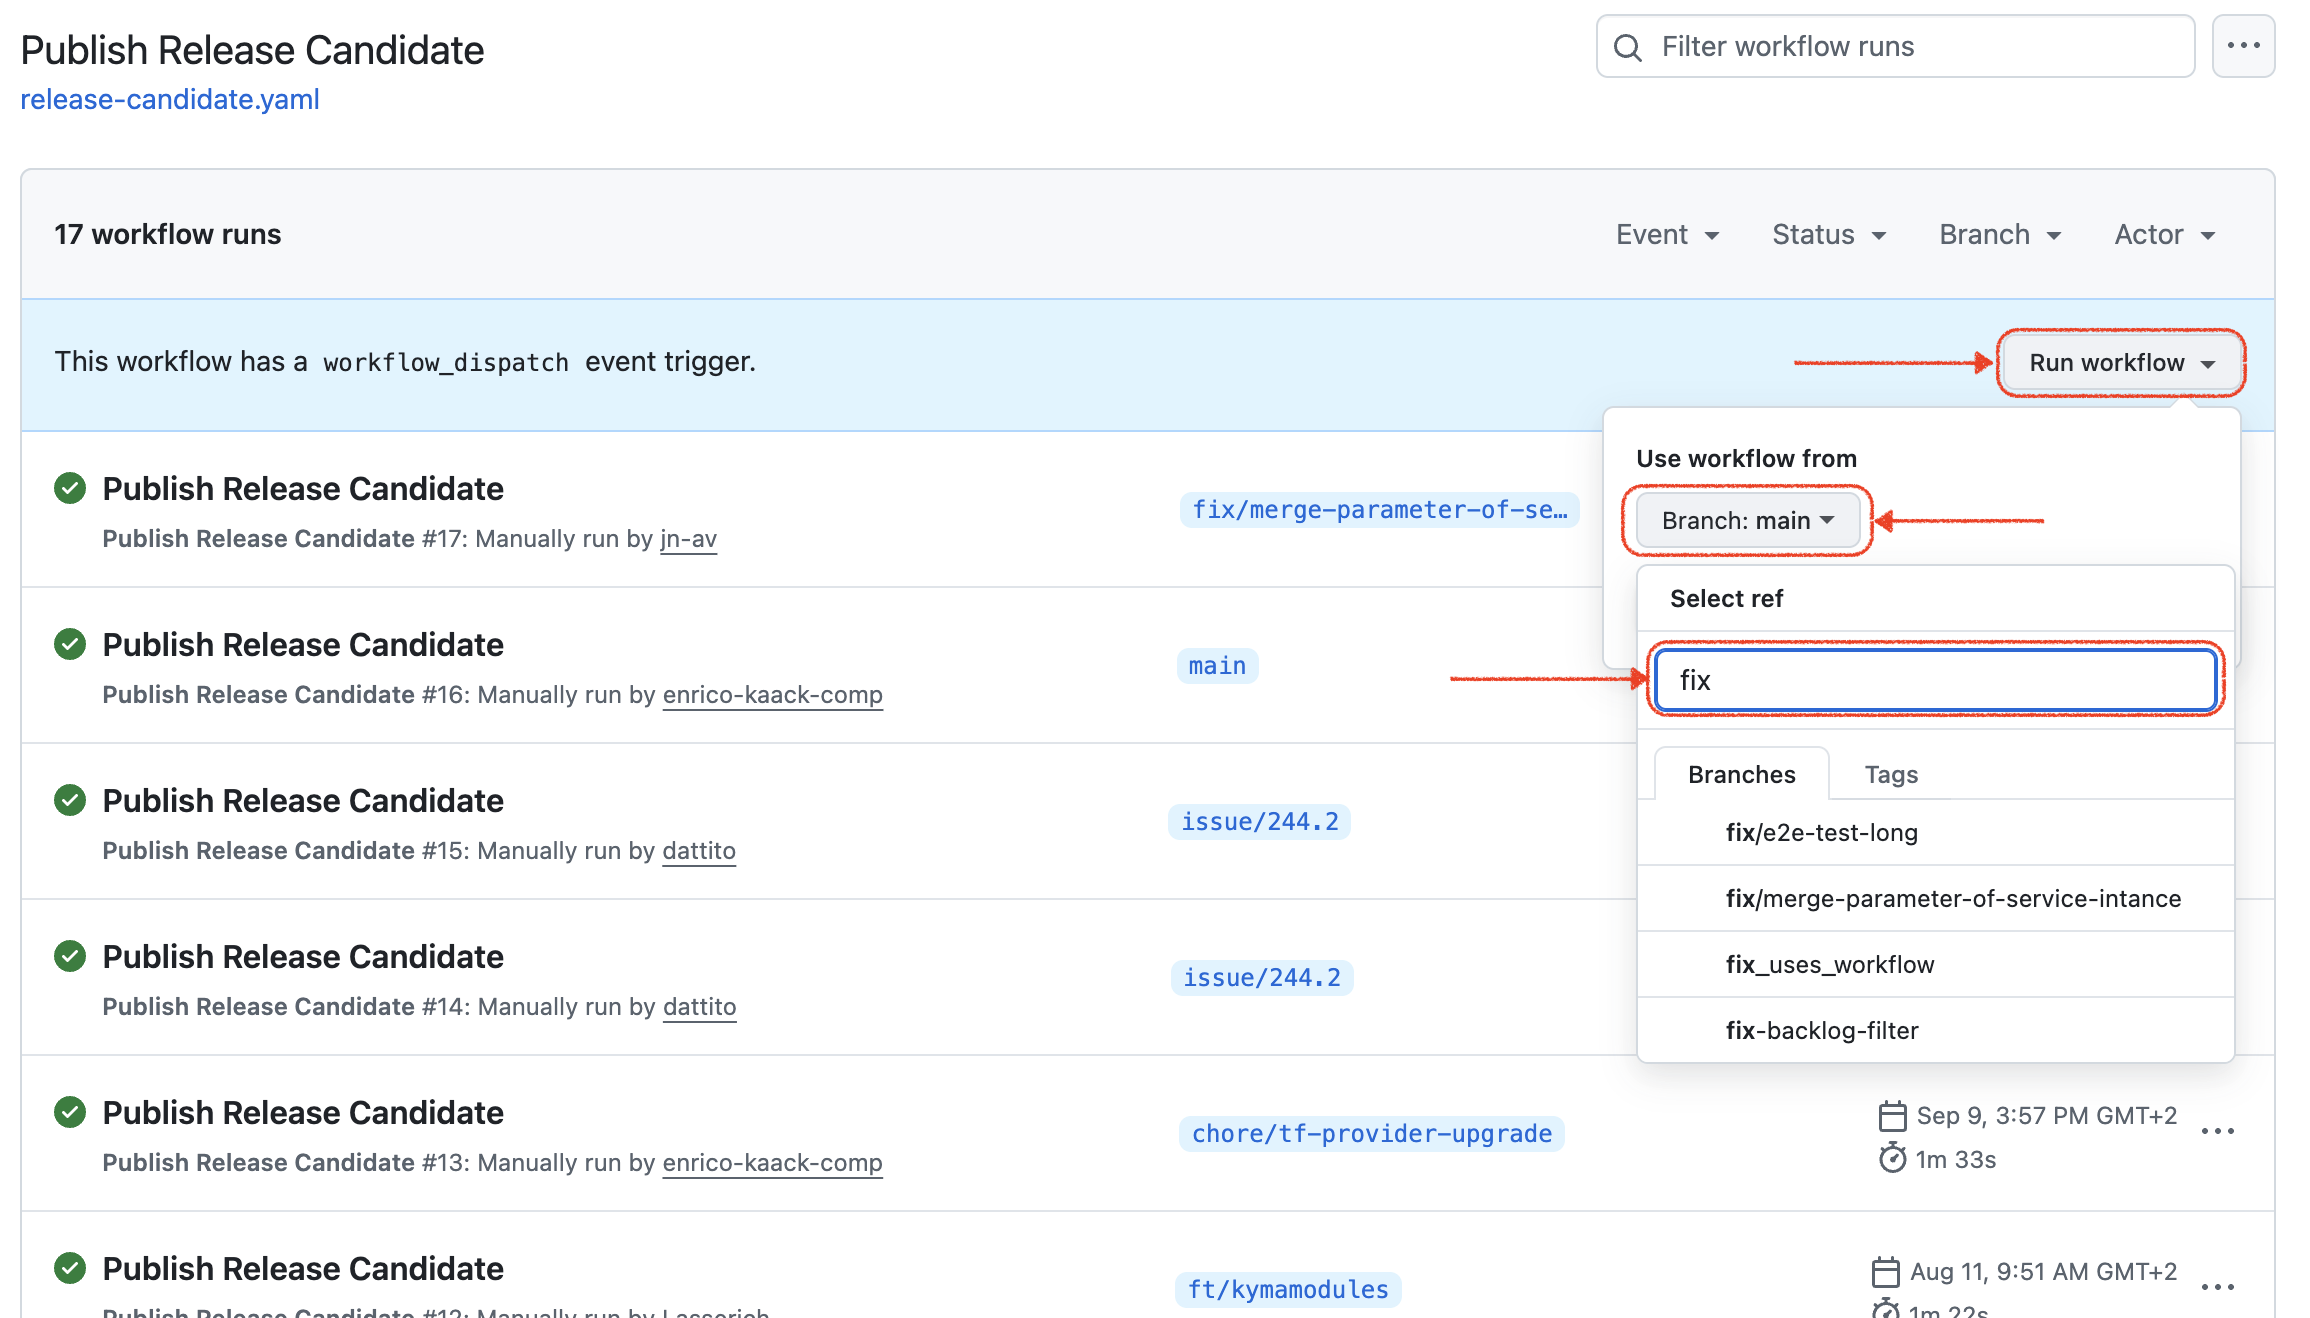
- Go to the Actions tab

- Select the
Publish Release Candidateworkflow on the left (it may also be named differently depending on the project, for example.github/workflows/release-candidate.yaml)

- Select Run workflow, choose the branch you want to create the release candidate from, and click Run workflow
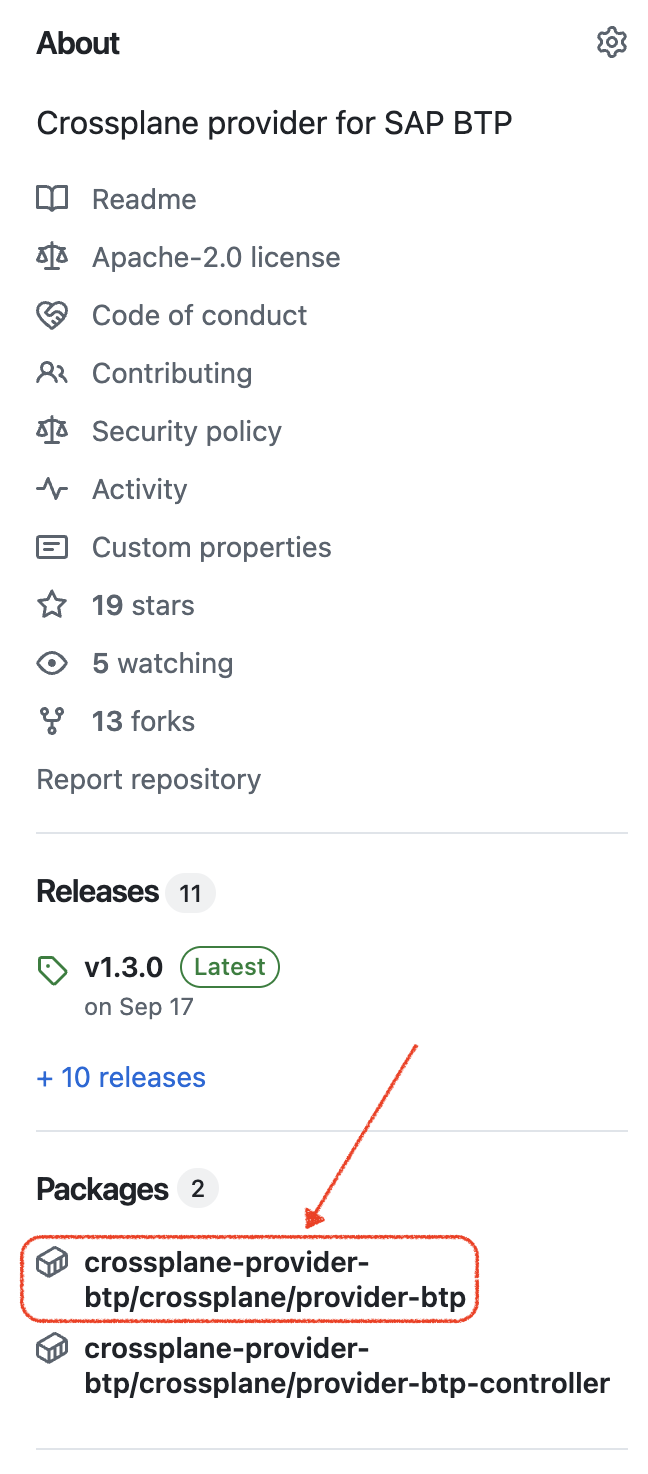
- Go back to the GitHub project start page and select the matching package in the Packages section on the right side (e.g.
crossplane-provider-btp)
- Select the newly created image that matches your commit hash
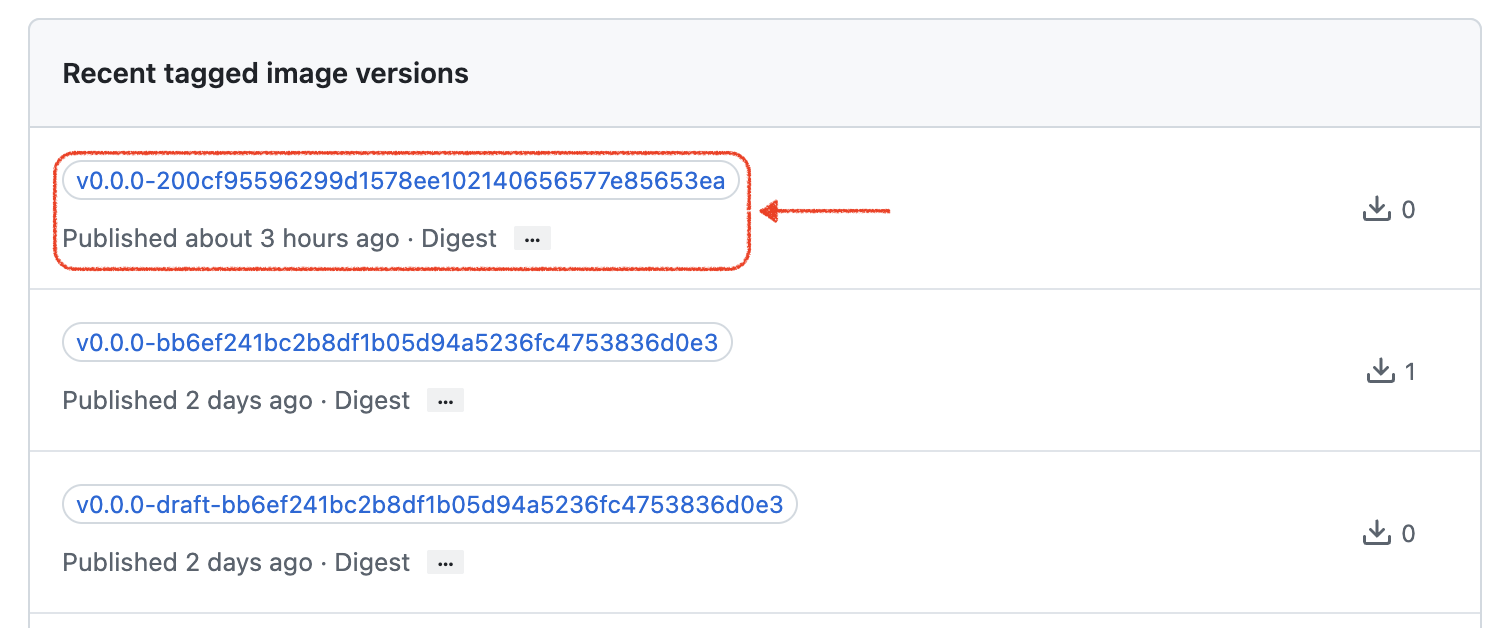
- Share the image URL with, for example, the reporter of the bug to validate your fix (e.g.
ghcr.io/sap/crossplane-provider-btp/crossplane/provider-btp::sha-<commit-hash>)
Validate Build
To validate a build, please follow the steps below to use the release candidate image created for your fix.
- Create a KinD cluster locally or use a cluster in your development environment.
- Set up the required Artifactory pull secret in the cluster to be able to pull the release candidate image.
- Install the release candidate provider using the following YAML. Don't forget to replace the image URL with the one created for your fix.
apiVersion: pkg.crossplane.io/v1
kind: Provider
metadata:
    name: btp-provider
spec:
    package: <your-release-candidate-image-url>
    packagePullSecrets:
        - name: artifactory-readonly-docker
Publish a release
Once the release candidate has been validated, we can publish it. For some fixes and features it makes sense to publish a new release immediately. For others it makes sense to wait and combine them with additional changes in a single release.
If your feature or fix is already on the main branch, it will be included in the next release. If not, please start the process to merge your code changes into main.
For important bug fixes and features, let's start a discussion about whether it makes sense to publish a new release right away or wait for the next one.