Saved Cart
Note: Spartacus 3.x is no longer maintained. Please upgrade to the latest version.
Note: Spartacus 3.x was tested with SAP Commerce Cloud versions 1905 to 2105. Spartacus 3.x has not been verified to work with (and is not guaranteed to work with) SAP Commerce Cloud 2211 or later releases.
Note: This feature is introduced with version 3.2 of the Spartacus libraries.
The saved cart feature allows users to save one or more carts for later use. Users can benefit from the saved cart feature to enhance their online shopping experience. For example, they can create a saved cart for items that they purchase on a regular basis, or they can create different saved carts for specific types of purchases.
Note: The saved cart feature currently works only with B2B storefronts.
For more information, see Multiple Saved Carts on the SAP Help Portal.
Table of Contents
Enabling Saved Cart
You can enable the saved cart feature by installing the @spartacus/cart feature library. For more information, see Installing Additional Spartacus Libraries.
CMS Components
The saved cart feature is CMS driven, and consists of the following CMS components:
AddToSavedCartsComponentAccountSavedCartHistoryComponentSavedCartDetailsOverviewComponentSavedCartDetailsItemsComponentSavedCartDetailsActionComponent
You can configure the saved cart feature by using SmartEdit to display the saved cart components in Spartacus, or you can manually add them to content slots using ImpEx.
If you are using the spartacussampledata extension, the saved cart components are already enabled. However, if you decide not to use the extension, you can enable them through ImpEx.
Note: The $contentCV variable that is used throughout the following ImpEx examples, and which stores information about the content catalog, is defined as follows:
$contentCatalog=powertools-spaContentCatalog
$contentCV=catalogVersion(CatalogVersion.catalog(Catalog.id[default=$contentCatalog]),CatalogVersion.version[default=Staged])[default=$contentCatalog:Staged]
Adding CMS Components Manually
This section describes how to add the various saved cart CMS components to Spartacus using ImpEx.
You can enable the Saved Carts link in the My Account drop-down menu with the following ImpEx:
INSERT_UPDATE CMSLinkComponent;$contentCV[unique=true];uid[unique=true];name;url;&linkRef;&componentRef;target(code)[default='sameWindow'];restrictions(uid,$contentCV)
;;SavedCartsLink;Saved Carts Link;/my-account/saved-carts;SavedCartsLink;SavedCartsLink;;loggedInUser
You can enable the Saved Carts history page and Saved Carts Details page with the following ImpEx:
INSERT_UPDATE ContentPage;$contentCV[unique=true];uid[unique=true];label
;;saved-carts;/my-account/saved-carts
;;savedCartDetailsPage;/my-account/saved-cart
You can enable the Saved Carts and Save Cart for Later buttons with the following ImpEx:
INSERT_UPDATE CMSFlexComponent;$contentCV[unique=true];uid[unique=true];name;flexType
;;AddToSavedCartsComponent;Add To Saved Carts Component;AddToSavedCartsComponent
You can enable the saved cart history component with the following ImpEx:
INSERT_UPDATE CMSFlexComponent;$contentCV[unique=true];uid[unique=true];name;flexType
;;AccountSavedCartHistoryComponent;Account Saved Cart History Component;AccountSavedCartHistoryComponent

INSERT_UPDATE ContentSlot;$contentCV[unique=true];uid[unique=true];name;cmsComponents(uid, $contentCV)
;;BodyContent-saved-carts;Body content for Saved Carts History Slot;AccountSavedCartHistoryComponent
You can enable the saved cart details components with the following ImpEx:
INSERT_UPDATE CMSFlexComponent;$contentCV[unique=true];uid[unique=true];name;flexType
;;SavedCartDetailsOverviewComponent;Saved Cart Details Overview Component;SavedCartDetailsOverviewComponent
;;SavedCartDetailsItemsComponent;Saved Cart Details Items Component;SavedCartDetailsItemsComponent
;;SavedCartDetailsActionComponent;Saved Cart Details Action Component;SavedCartDetailsActionComponent

INSERT_UPDATE ContentSlot;$contentCV[unique=true];uid[unique=true];name;cmsComponents(uid, $contentCV)
;;BodyContent-savedCartDetailsPage;Body content for Saved Carts Details Slot;SavedCartDetailsOverviewComponent,SavedCartDetailsItemsComponent,SavedCartDetailsActionComponent
User Interface
The saved cart feature extends the Cart interface with name, description and saveTime. When saving a cart, the name is required, and the description is optional.
Cart Page
You can only save a cart from the Cart page when you are logged in and you have items in your cart. If you are not logged in, the Saved Carts and Save Cart For Later links re-direct you to the login page.
Creating a Saved Cart
-
Add one or more items to your cart, then open the Cart page:
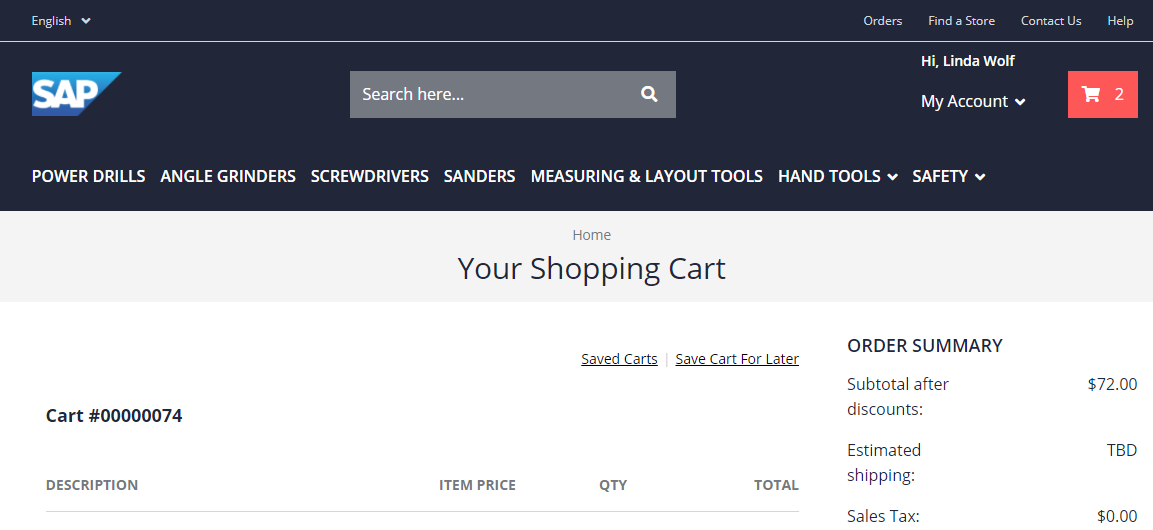
-
Click Save Cart For Later.
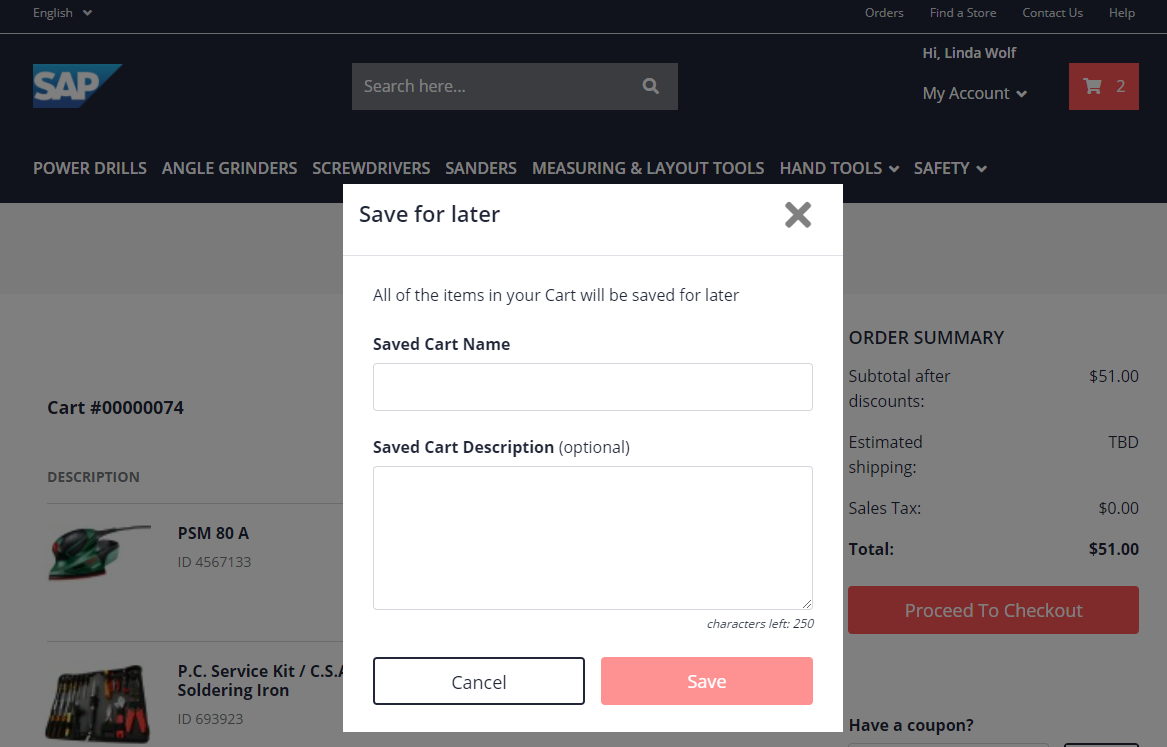
The Save for later dialog box appears:
-
Add a name for your saved cart. You can also add a description.
-
Click Save.
After saving the cart, your current active cart is no longer displayed because it has been saved.
Saved Cart History Page
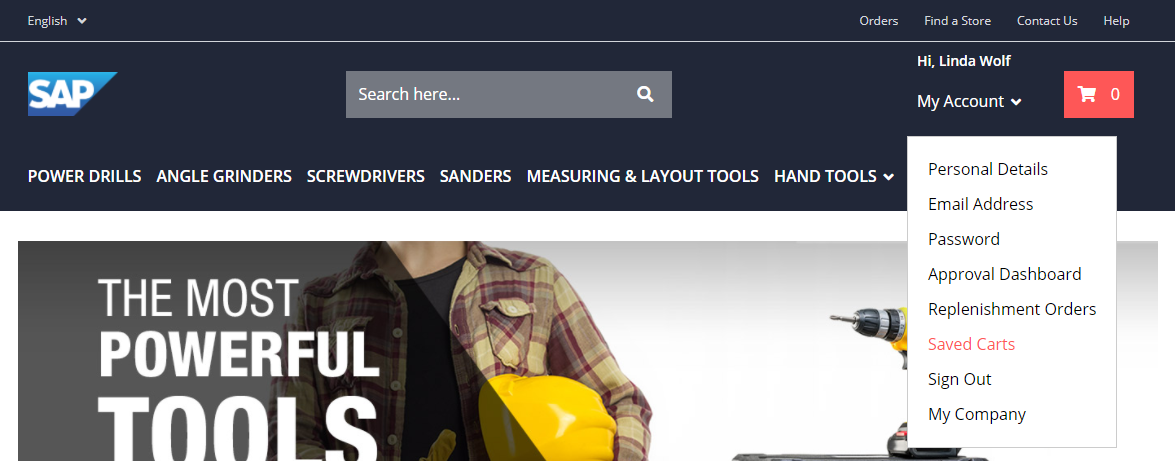
Once you have saved a cart, you can view a list of your saved carts in the Saved Carts history page. You can access the history page by clicking on Saved Carts in the My Account drop-down menu, as shown in the following example:
From the Saved Carts history page, you can access the details of any saved cart by clicking on the saved cart, or on any element in the row, except for the Make Cart Active link.
The following is an example of the Saved Carts history page:
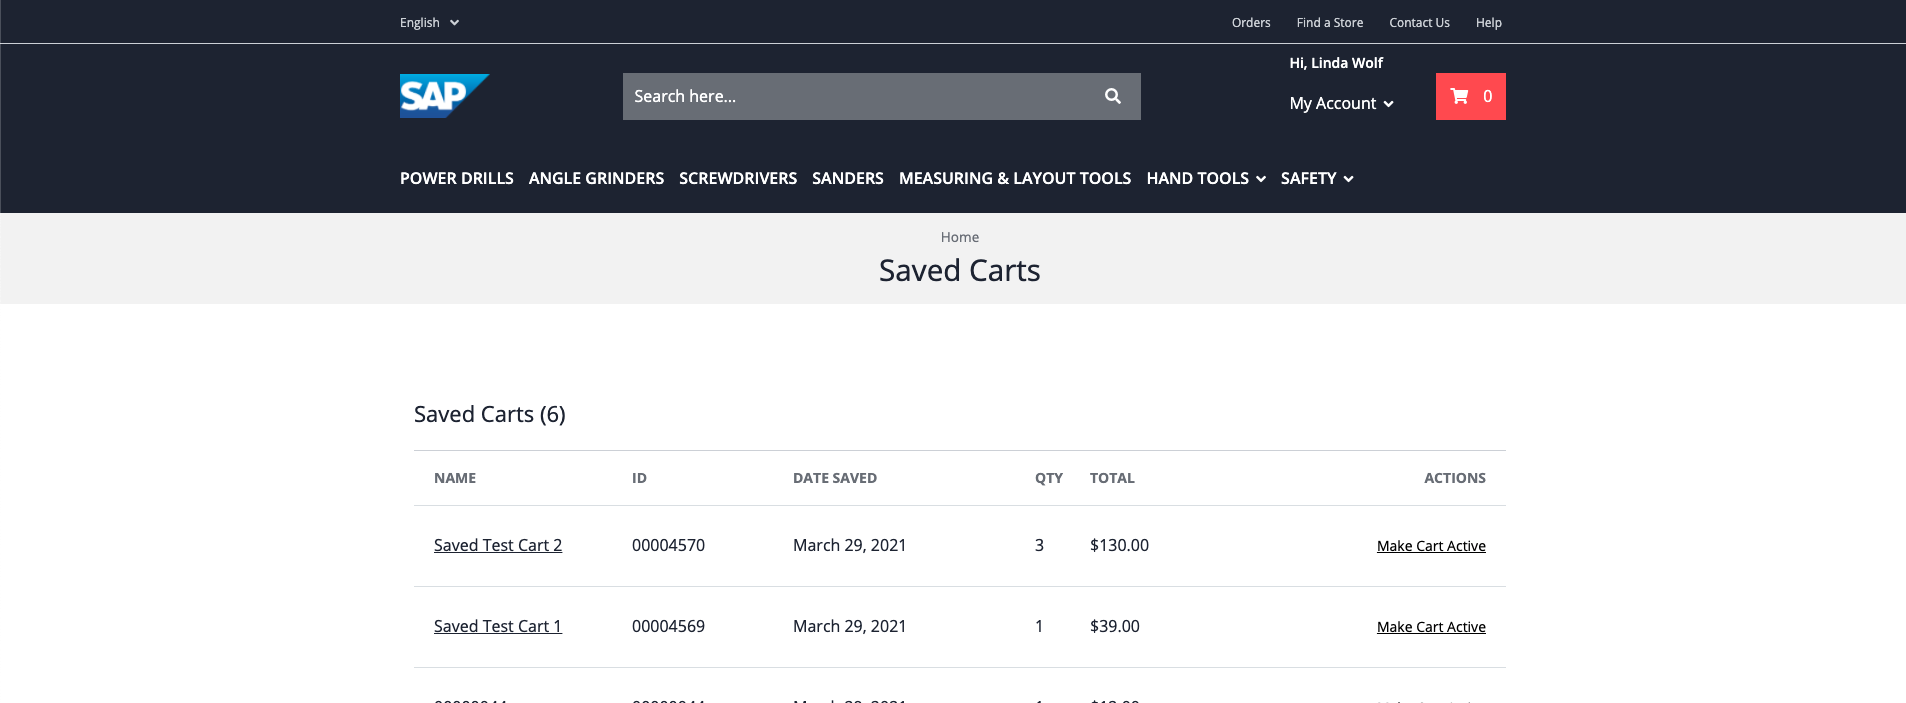
When you click Make Cart Active, the selected saved cart becomes the active cart. After being made active, the saved cart disappears from the list of saved carts.
Note: If you already have an active cart when you click Make Cart Active, your current cart becomes a saved cart, and the saved cart becomes the active cart. The name for the new saved cart is generated automatically from the cart ID.
Saved Cart Details Page
The Saved Cart Details page shows all the relevant information about a specific saved cart, such as the items in the cart, the quantities, and the date the cart was saved.
The following is an example:
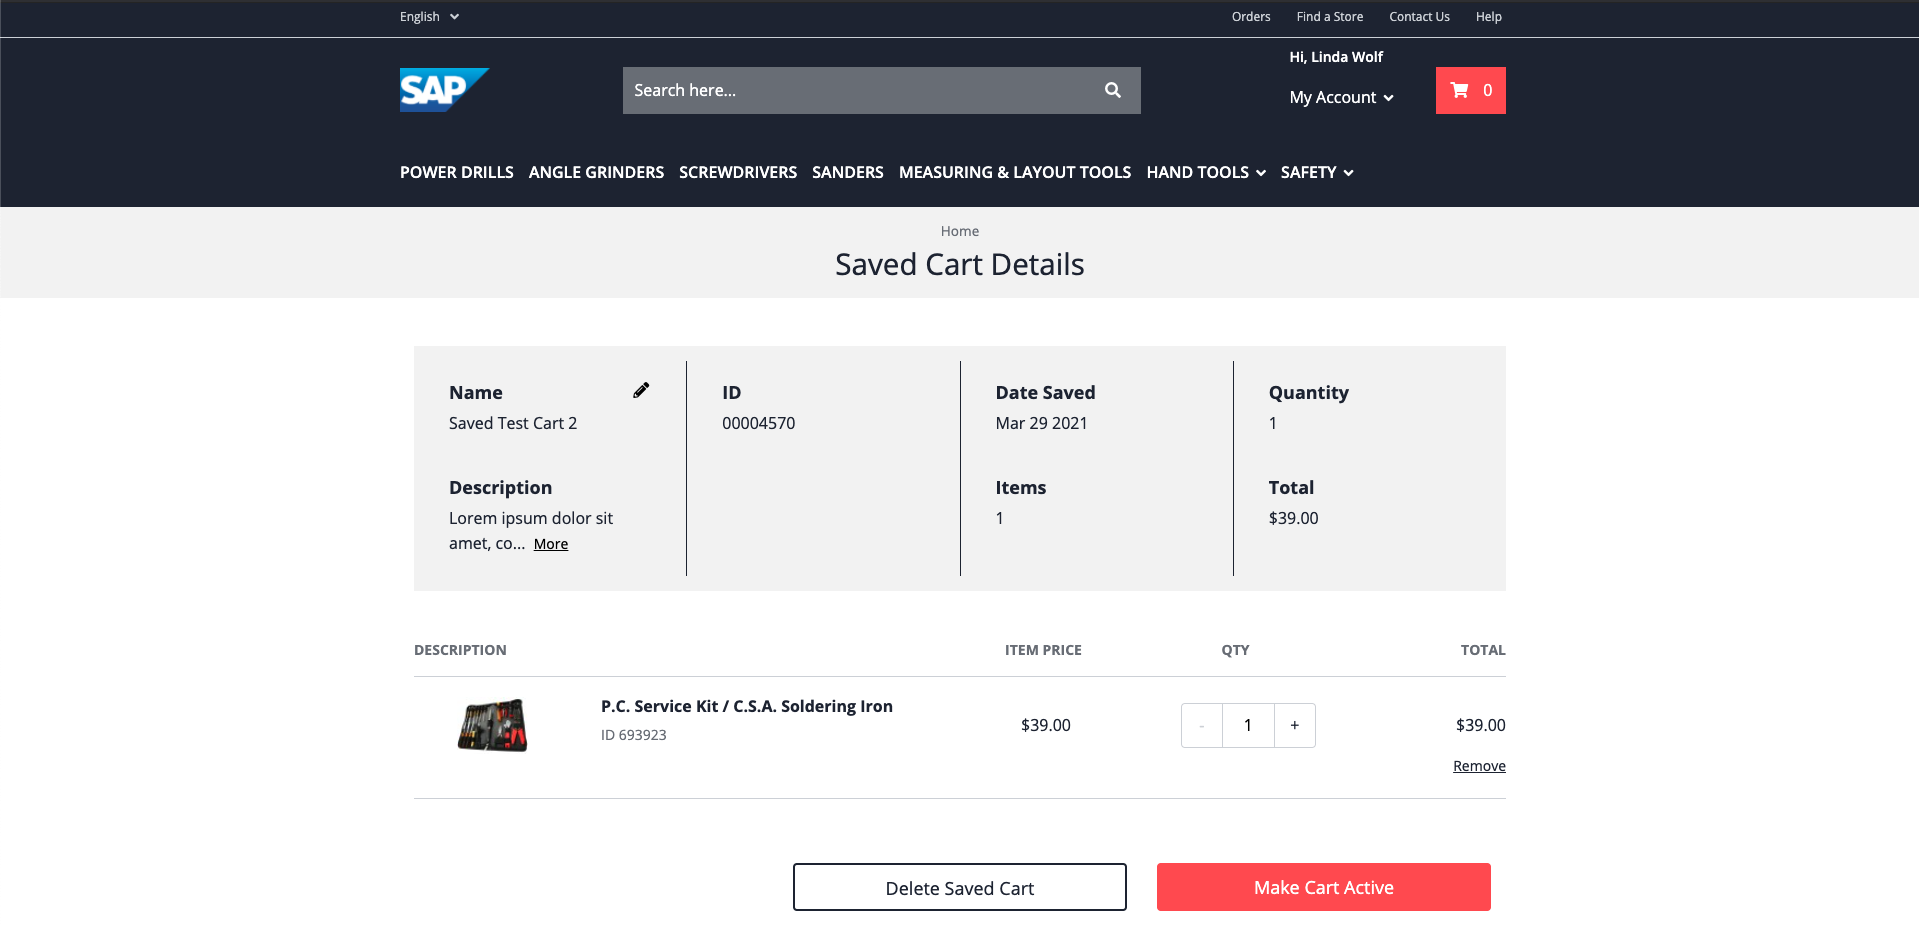
You can update the name and description of the saved cart by clicking the pencil icon. You can also change the quantities of a product, and also remove it from your saved cart.
Note: If you remove all of the items from a saved cart, the saved cart is deleted and you are redirected to the Saved Carts history page.
Limitations
The saved cart feature does not currently work with the Configurable Products integration.
The saved cart feature also currently does not allow you to add multiple products to the active cart from the Saved Cart Details page.